Views: 0 Author: Site Editor Publish Time: 2026-10-28 Origin: Site
Purchasing replacement hardware without exact offset measurements leads directly to operational failures. You might experience door binding, misaligned gaps, or even permanently damaged frames. We know these issues disrupt daily operations and compromise facility security. This guide exists to solve that problem. We wrote it specifically for decision-makers and installers. You need precise measurement protocols to confidently purchase and install the correct replacement hardware. Guessing is never a viable strategy. By standardizing the measurement process, you eliminate reliance on trial and error. You ensure complete compatibility with modern hardware specifications. We will walk you through the core mechanics of hinge offsets. You will learn step-by-step measurement techniques. Finally, we will show you how to evaluate materials and avoid common installation pitfalls.
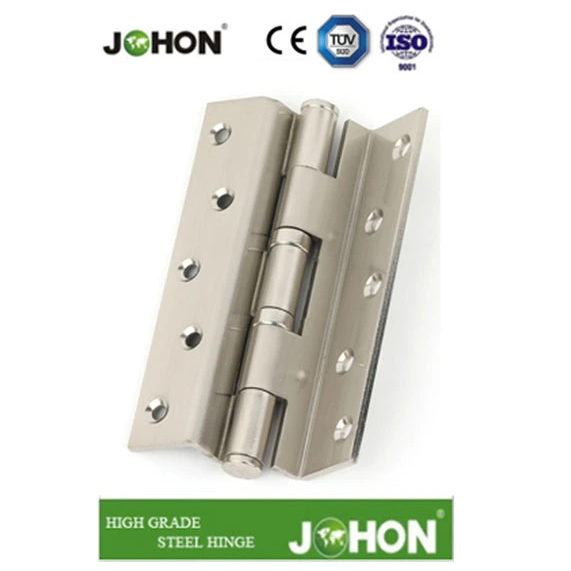
The offset of a cranked hinge dictates the door's position relative to the frame (full overlay, half overlay, or inset).
Accurate measurement requires assessing the bend depth of the hinge leaf or calculating the door's overlap on the cabinet/door frame.
Standardizing measurement to millimeters ensures compatibility across major hardware manufacturers.
Once the offset is identified, hinge selection must prioritize load capacity and material durability (e.g., upgrading to ball bearing or steel components based on usage).
To measure accurately, we must first define the mechanism. The "crank" refers to the specific physical bend in the hinge arm. This bend directly dictates how a door positions itself against the cabinet or door frame. The crank essentially reduces the door's overlay. A straight arm provides a full overlay, covering the entire side panel. A single crank creates a half overlay, allowing two doors to share one central partition. A double crank creates an inset profile, sitting the door entirely flush inside the frame. Understanding this geometry forms the foundation of proper hardware selection.
Failing to match the existing offset creates severe functional problems. When the offset is mismatched, doors physically fail to close properly. They bind against the frame or strike adjacent doors. This friction exerts massive leverage on the hinge screws. Over time, incorrect offsets will rip screws entirely out of MDF or wood frames. In commercial environments, this misalignment compromises fire-rating seals. It also creates critical security vulnerabilities. You cannot secure a door correctly if the locking mechanisms no longer align due to a hinge geometry error.
Our criteria for success remain strict. A successful measurement must translate into a perfect one-to-one replacement. You should experience zero need for routing. You should require zero new drilling. The installer must avoid making any structural modifications to the existing door or frame. Achieving this standard requires absolute precision.
Precision requires the right equipment. You must abandon tape measures for this task. We require digital calipers to ensure exact millimeter accuracy. You will also need a metal straight edge and a completely flat, well-lit surface. Do not attempt these measurements while the hinge remains attached to the door.
If you have the original hardware, this method provides the fastest path to a replacement specification. Follow these steps carefully to ensure accurate readings.
Remove the existing hinge completely from both the door and the mounting plate.
Place the hinge arm completely flat on your work surface. The side that normally attaches to the mounting plate must face down.
Position your straight edge across the top of the hinge cup or the flat leaf plane.
Use your digital calipers to measure the vertical drop. Measure from the flat mounting plane up to the straight edge resting on the cup plane.
Record this exact millimeter measurement. It represents your physical offset.
Sometimes the original hinge is missing, broken, or improperly specified. In these cases, you must derive the offset from the cabinet or frame dimensions.
Measure the total width of the frame side panel where the mounting plate will attach.
Close the door (or hold it in the closed position). Measure exactly how far the door overlaps this side panel.
Determine your desired clearance gap. Most standard applications require a 1.5mm to 2mm gap to prevent binding.
Calculate the offset. Subtract the desired clearance gap from the overlap measurement. This final number dictates the crank profile you need.
Industry Standard Hinge Offset Profiles
Overlay Type | Standard Offset Measurement (mm) | Common Application |
|---|---|---|
Full Overlay (Straight Arm) | 0mm | End cabinets, single doors covering the frame completely. |
Half Overlay (Single Crank) | 9.0mm - 9.5mm | Shared center partitions where two doors meet. |
Inset (Double Crank) | 15.0mm - 17.0mm | Doors sitting entirely flush inside the decorative frame. |
Securing the correct millimeter measurement solves only half the problem. You must now evaluate material and operational constraints. Selecting the wrong material guarantees premature failure, even with a perfect offset measurement. We evaluate environmental conditions and door weight to finalize the specification.
Material selection dictates hardware lifespan. High-humidity environments rapidly destroy standard zinc-plated hardware. Heavy solid-core doors require exceptional rigidity to prevent metal fatigue. Commercial facilities also mandate strict compliance with fire and safety regulations. Under these demanding conditions, you should specify a steel cranked hinge. Steel resists moisture degradation better when properly treated. It also handles extreme impact forces without warping the cranked arm.
Friction and vertical load management require equal attention. Examine the wear patterns on your old hardware. Do you see deep grooves in the knuckles? Did the previous door sag heavily under its own weight? These symptoms indicate excessive friction and vertical stress. Upgrading to a ball bearing cranked door hinge provides a direct business case. Ball bearings distribute vertical loads efficiently. They drastically reduce friction during the swing cycle. This upgrade prevents future sagging and accommodates a much higher frequency of daily use.
Finally, consider adjustability versus fixed offsets. Modern concealed hinges often feature 3D cam adjustments. These small screws allow you to modify height, depth, and side-to-side positioning. They typically offer a tolerance of ±2mm. You must remember that cam adjustments exist to compensate for minor seasonal wood expansion or slight installation variances. They cannot fix an incorrect initial offset measurement. Always buy the correct fixed offset first, then use cams for final tuning.
Even experienced installers encounter significant hurdles during hardware replacement. Accurate measurements can still lead to failure if you ignore the surrounding geometry of the door and frame. We compiled these warnings from extensive field experience to help you avoid costly rework.
Cup Hole Depth: Matching the offset becomes useless if the new hinge cup is too deep for your existing door bore. Standard bores measure 11mm or 13mm deep. If you buy a heavy-duty hinge requiring a 14mm cup, it will bottom out. This forces the door away from the frame and ruins your calculated offset. Always verify the cup depth.
Mounting Plate Discrepancies: Installers often try to save time by leaving the old mounting plate on the frame. Do not do this. Retaining an old mounting plate while installing new cranked hinges alters the final geometry. Different manufacturers use different plate thicknesses (e.g., 0mm, 3mm, 5mm). Mixing brands guarantees a ruined alignment.
Hinge Boring Patterns: The distance between the screw holes on the hinge cup varies wildly. The European standard utilizes a 45mm or 52mm pattern. If you purchase hardware with a mismatched boring pattern, you will have to plug the old holes and drill new ones. This violates our goal of a zero-modification installation.
Edge Distance Tolerances: The distance from the edge of the door to the edge of the cup hole (the "tab" measurement) impacts the final overlay. A standard tab is 3mm to 7mm. If your new hinge requires a different tab distance, your meticulously measured offset will still result in binding.
You now possess the data required to source the correct replacement. We must consolidate this data into a strict purchasing checklist. Before you approve any hardware order, confirm you have recorded four critical data points. First, list your exact offset measurement in millimeters. Second, verify the existing cup diameter and depth. Third, document the total door weight to determine load requirements. Fourth, specify the necessary material based on environmental conditions.
Vendor evaluation requires extreme diligence. Never rely on generic product descriptions or marketing copy. You must cross-reference manufacturer specification sheets. Look for CAD drawings or schematic diagrams on the vendor's website. A reliable spec sheet will explicitly state the millimeter offset, cup depth, and boring pattern. If a vendor cannot provide a technical spec sheet, you should source your hardware elsewhere.
Your actionable next step is to compare your exact checklist against a curated catalog of high-tolerance hardware. Filter the catalog by your specific millimeter offset first. Then, narrow the results by material and bearing type. This methodical approach guarantees a seamless installation.
Precision measurement serves as the only reliable pathway to a successful installation. Guesswork invariably leads to damaged doors, stripped frames, and operational downtime. By methodically measuring the physical bend of the hinge or calculating the frame overlap, you secure the exact geometric profile required.
We highly recommend standardizing your approach using digital calipers and millimeter readings. This removes all ambiguity from the sourcing process. Furthermore, pairing the correct offset with the appropriate materials—such as high-load bearings or humidity-resistant steel—guarantees long-term operational stability.
Your next step is to gather your calipers, measure your existing hardware, and build your technical checklist. Armed with accurate data, you can source replacement parts confidently, ensuring zero modifications to your existing doors.
A: You can only make micro-adjustments. Modern concealed hinges feature 3D cam screws that allow for height, depth, and side-to-side tweaking. However, this adjustment is typically limited to ±2mm. These cams cannot compensate for buying a hinge with the wrong physical offset bend. The core offset is fixed by the metal arm.
A: The global hardware industry standardizes around the metric system, specifically millimeters. Imperial measurements (fractions of an inch) often lead to rounding errors during conversion. Because hinge tolerances require precision down to 1.5mm gaps, converting from inches introduces severe alignment risks. Always measure and purchase using millimeters.
A: You must measure the door frame directly. Measure the total width of the cabinet side panel. Next, measure exactly how far the door should overlap this panel when fully closed. Subtract your desired clearance gap (usually 2mm) from this overlap. This calculation provides the required offset for your new hardware.
 English